
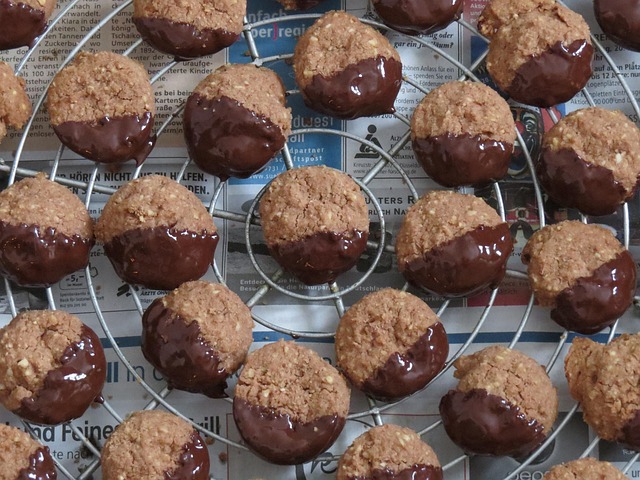
Crafting compelling product photography for personalized cookies requires understanding your target audience—children or adults—and tailoring visuals accordingly. For kids, emphasize joy with playful angles and vibrant backdrops; for adults, highlight craftsmanship and premium ingredients. Utilize lighting techniques like soft, diffused natural light to showcase textures, and incorporate simple, clean backdrops and props to let the cookies be the star. Close-up photography emphasizes intricate details, while careful editing and post-processing ensure visually appealing images that capture the unique charm of each personalized cookie creation.
“Bring your personalized cookies to life with captivating product photography! This comprehensive guide navigates the art of visualizing these delightful treats, from understanding your target audience to mastering lighting and editing techniques. Learn how to create a visually stunning story around your baked goods, ensuring each photo highlights the unique details that make your personalized cookies so irresistible. Get ready to transform your snack photography into a symphony of mouthwatering imagery.”
- Understanding Your Audience: Who Are You Baking For?
- The Art of Styling: Creating a Tasty Visual Story
- Lighting Techniques for Appealing Cookie Imagery
- Background Choices: Setting the Perfect Scene
- Capturing Close-ups: Zoom In on Those Delicious Details
- Editing and Post-Processing: Polishing Your Cookie Photos
Understanding Your Audience: Who Are You Baking For?

When it comes to product photography for cookies, understanding your audience is key. Who are you baking for? Are they children excited about a special treat? Or maybe adults indulging in a moment of comfort? Knowing your target audience influences every aspect of your photoshoot. Personalized cookies, with custom messages and designs, demand visuals that capture the joy and anticipation associated with these unique treats.
Focus on creating images that resonate with your viewers’ emotions. For kids, use playful angles and vibrant backdrops to showcase the excitement factor. For adults, emphasize the craftsmanship and high-quality ingredients that make each cookie special. Remember, the photos should tell a story and create an emotional connection—after all, cookies are often associated with comfort, celebrations, and shared moments.
The Art of Styling: Creating a Tasty Visual Story

The art of styling in product photography for cookies is a delightful dance between aesthetics and appetite. It’s not just about capturing a pretty picture; it’s crafting a visual story that tantalizes the senses. Each element on the plate, from the arrangement of cookies to accompanying props, plays a role in conveying the unique charm and flavors of personalized cookies. Consider the backdrop—a rustic wooden table or a sleek marble surface—as the canvas for your culinary masterpiece. The choice influences the overall mood: warm and cozy for homemade treats, or modern and elegant for gourmet delights.
Additions like fresh fruits, creamy toppings, or colorful sprinkles not only enhance the visual appeal but also tell a story about texture, freshness, and variety. Lighting is key; soft, diffused light can make your cookies shine without harsh shadows, while a pop of natural sunlight can bring out the warmth and richness. Remember, each shot should invite viewers to take a bite, inviting them into the delightful world of personalized cookie creations.
Lighting Techniques for Appealing Cookie Imagery

Creating visually appealing images of cookies is an art, and mastering lighting techniques can elevate your product photography game, especially for personalized cookies. The key lies in understanding how light interacts with these delicate treats. Soft, diffused natural light is often the preferred choice, as it provides a gentle glow that showcases the texture and intricate designs of personalized cookies without harsh shadows. Positioning your cookie subjects near a window during golden hour—the few hours after sunrise or before sunset when sunlight is warm and soft—can yield stunning results.
Experimenting with various light sources and angles can add depth to your photos. For instance, using a ring light or multiple flash units placed at different heights and distances can create dramatic effects, highlighting the three-dimensional aspects of personalized cookies. Additionally, playing with shadows by strategically placing objects or reflectors can draw attention to specific details, making each cookie’s uniqueness pop in the frame.
Background Choices: Setting the Perfect Scene

When setting up a product photography session for personalized cookies, choosing the right background is key to creating an appealing visual story. Opt for simple, clean backdrops that won’t overshadow your delicious treats. A solid color like pure white or a subtle pattern in soft pastels can create an elegant and minimalist look, allowing the cookies to become the focal point. This approach works especially well for showcasing intricate designs and custom messages on each cookie.
Consider using props too, such as wooden slices or lace doilies, placed beneath the cookies to add depth and texture. These subtle additions can enhance the overall aesthetic without diverting attention from your personalized creations. The goal is to create a visually pleasing scene that showcases both the beauty and uniqueness of each individual cookie, ensuring potential customers appreciate the craftsmanship and creativity behind them.
Capturing Close-ups: Zoom In on Those Delicious Details

When it comes to showcasing personalized cookies, close-up photography is a game-changer. By zooming in on the intricate details—from the swirls of icing to the edible decorations—you can highlight the craftsmanship and uniqueness of each cookie. This level of detail not only appeals to potential customers’ senses but also gives them a better appreciation for the artistry behind your baked goods.
Focusing on close-ups allows you to capture the beauty in the small things, such as the subtle differences in colors, textures, and designs. These images can be particularly effective when presented alongside broader shots of a cookie collection, providing a delightful contrast that captivates viewers and emphasizes the diversity of your personalized cookie offerings.
Editing and Post-Processing: Polishing Your Cookie Photos
After capturing the initial images, the next crucial step in showcasing personalized cookies is through meticulous editing and post-processing. This stage allows you to enhance the visual appeal and highlight the unique details of each cookie creation. Start by adjusting basic settings like exposure, contrast, and saturation to ensure your photos are well-balanced and accurately represent the vibrant colors and textures of the cookies.
Focus on fine-tuning each image individually, paying attention to areas like lighting and background. Remove any unwanted elements or distractions from the backdrop to let the cookies take center stage. Enhance the clarity of the cookie details using selective sharpening tools, ensuring every intricate design and personalized message is crisp and visible. Don’t forget to adjust the overall color tone to match the brand’s aesthetic or the desired ambiance, whether it’s a warm, inviting feel for a home bakery or a more professional look for a commercial enterprise.